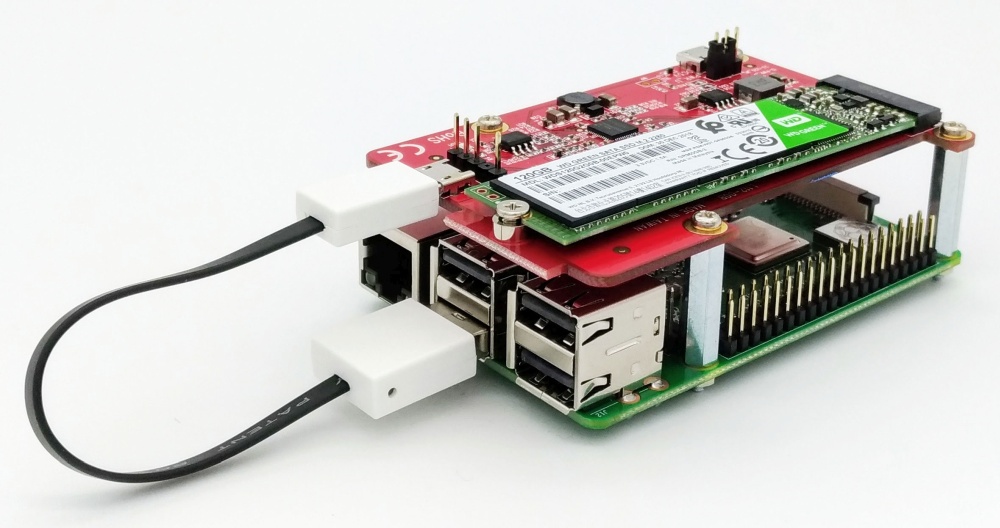
Raspberry pi 3B+ with no SD card at all, running on a m.2 SSD
My Raspberry Pi has killed several micro SD cards over the years, simply wearing them out until they die and leave the SD card unbootable and unreadable. Now i have had enough, and decided to ditch the easily corruptable SD cards for good, and slap a m.2 ssd on my Raspberry Pi instead.
I am so happy that i did! No more corrupted SD cards, no more reformatting and reinstalling, and no more lost data. Also, it didn’t even cost me a fortune, as i spent just $30 on the adapter board and another $30 on a 120GB m.2 SSD.
It always seem to happen that my SD card got corrupted at unfortunate times, and usually a long time since my last backup of data. Not only did rasbian crash miserably, but the SD card becomes unreadable in certain sectors, leading to loss of data.
Once a Raspberry Pi kills a SD card, the only way forward is to flash it with a complete new installation of rasbian, overwriting all data. The faulty part will still exist in the SD card, so it won’t be long until it gets corrupted again.
How to replace amicro SD card with a m.2 SSD:
Online guides will instruct you in disabling writing on the SD card, or moving write heavy log files to a USB drive. However, the most effective way to avoid SD card problems for good, is to completely replace the SD card, and use a real SSD instead.
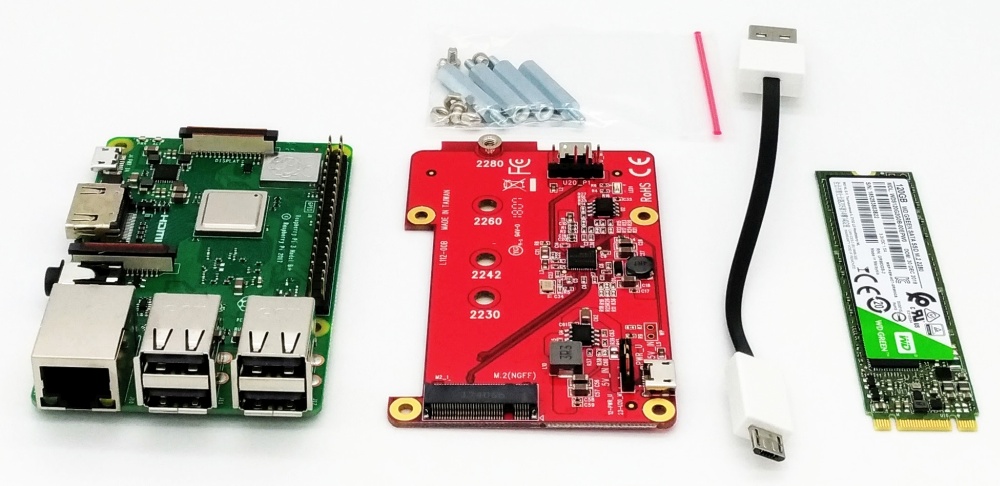
What you need: Raspberry Pi 3B+, m.2 sata adapter board (red) and a m.2 2280 SSD
You will need:
- A Raspberry Pi (model 3B+ preferrably)
- A USB to m.2 SATA SSD adapter
- A m.2 SSD with storage space matching your needs
Once you have the right gear, it is time to get rid of those SD card corruptions once and for all. Follow these steps to get started:
- Carefully slide the m.2 SSD into the adapter slot, and fasten it with the screw.
- Connect the micro USB to the m.2 SSD adapter card (the plug on the short side)
- Connect the USB to your computer, and wait for a LED to light on the board.
- Open Disk Management on your windows PC, by pressing CTRL + X and selecting “Disk Management”, or by running the command “diskmgmt.msc”
- You should now be prompted to initialize your new SSD. Click ‘OK’.
- Once initialized, you can right click the new drive in the list, select “create new volume”, and click OK through the creation wizard.
- Finally, you are ready to flash a OS like rasbian to your new SSD. You can do this exactly like you would flash a SD card. I prefer using Balena Etcher.
- Once flashed, simply unplug the USB from your PC and connect it to the Raspberry Pi as shown in the photo below.
(NOTE: if you are using an older Raspberry Pi than the 3B+, you need to follow this guide, before the Raspberry Pi will boot from the USB)
Raspberry pi 3B+ with no SD card at all, running on a m.2 SSD
It may take a few seconds, but the Raspberry Pi should boot from the new m.2 SSD, even if you have no SD card inserted. Note, that the raspi-config function to expand filesystem may not work, as this was made to work for SD cards.
M.2 SSD read and write speeds with a Raspberry Pi 3B+
Even though you cannot utilize the full speed potential of the SSD, you whould see significantly higher speeds than even the best SD cards can achieve. I tested my setup using the official method, and got:
47.6 MB/s Read
33.9 MB/s Write
All in all, you should experience a much faster Raspberry Pi, with almost no risk of your installation getting corrupted from excessive read/write actions.
I have been running my Raspberry Pi as a smart home server, allowing me to control and monitor all lights, heating, speakers, tv, chromecast, etc. from anywhere in the world. I am using Home Assistant, which is great. However, due to status logging writing data to the SD card all the time, the SD card gets worn down fast. SD cards are made for storing pictures on cameras, and not for running a live operating system with logging and whatnot.
It could be several months between the SD card getting corrupted, and usually more than a year before the SD card would be unrecoverably broken and needed replacement. Any crash is bad, but when the Raspberry Pi runs your entire automated home, suddenly nothing in the home works. No lights, heating, music or tv, until i got the chance to reformat the corrupted SD-card and reinstall it with rasbian and Home Assistant. This significantly lowered the W.A.F. and made me spend a lot of time on restoring old backups.
After replacing the SD card with a m.2 SSD, I have experienced none of the previous issues. I even noticed an increase in performance, probably due to the much better read/write speeds.
What are your experience after upgrading? Notice any difference? Please share your results in the comments below.
I haven’t been lucky in this endeavor so far. Attempted Manjaro & Ubuntu – both from the Pi menu options. While they initially boot fine, as soon as a second reboot comes, I get a spinning circle that is maintained for as long as the Pi is left alone.
Looks great, thank you for the tutorial!
Is your Pi/SSD combo still running without maintenance?
Yep 😊👍
Still running and not a single corrupt file system after switching to the SSD. So happy that I switched from the SD card. Much more reliable setup!
Hey! How has been the switch to an m.2 drive since you posted this article?
I’m thinking of booting off of an SSD myself, my SD card just got corrupted because of an improper shutdown.
Hi =)
It was the best thing I ever did! Has worked flawlessly ever since, and I run my Pi as Home Assistant server with way too much logging going on.
Not even a single corruption issue or need to reinstall.
However, I did once try to switch over to a Raspi 4, but realized too late that it did not support boot from USB (which the SSD adapter is). Thus, I am still running my raspberry Pi 3 with the m.2 SSD, and it is rock solid =D